

The Prosthetics Magazine, Issue 15
This article first appeared in print around summer 2019 in this excellent magazine edited and published by Neil Gorton.
Why fix it, if it isn’t broken? Well, because if we don’t, nothing new will ever come along. Ask Darwin, random mutation; it’s how new things happen.
One example is the idea I had of using a hot glue gun to create a rigid frame for an appliance. I was laying eyebrows onto a cap plastic base that had been sprayed over a silicone copy of a brow. I wanted a way of being able to locate them accurately on the actor’s face, keeping them stretched and intact during application; they are fiddly things as you might guess. I always keep a hot glue gun around and given cap plastic has thermo-mouldable properties, I wondered if a solid frame made form hot-glue might give me the rigidity I needed. To be honest, the brows themselves didn’t work that well, but they were easily placed exactly and easily. Success, I guess.
Years before that I had worked alongside US makeup artist Jay Wajebe, who was using a ring of light card applied to a flat mould in place of traditional flashing built into a mould to easily handle and apply the delicate cap plastic scars he had made. I can remember thinking: excellent idea. More recently another great craftsman, Rob Helenbrink from Holland, showed me how he uses Scotch tape in much the same way.
Now, I usually like to make and apply flat silicone pieces as transfers straight out of the mould and had routinely foregone adding flashing to my flat sculpts. Habits change and needs-must, and the hot glue gun and instant rigid flashing technique was born.
It’s worth noting at this point that the idea of pouring some carefully pigmented expensive silicone just for it to be discarded does seem flawed if more efficient alternatives exist …
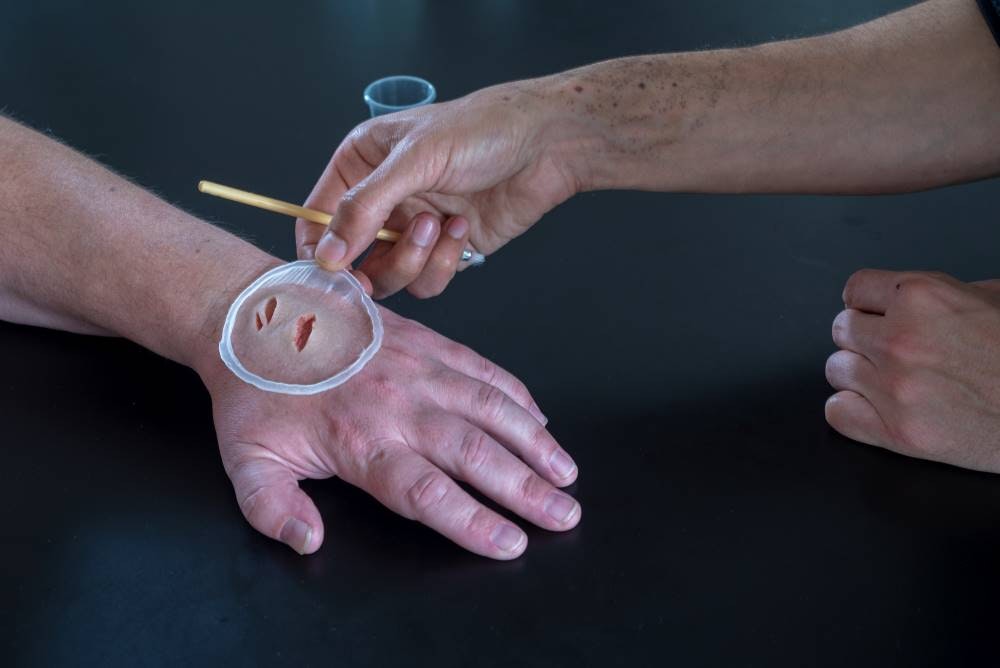
The point is, a rigid frame around a flat piece keeps its edges defined and intact without ever being allowed to fold or distort. I find it makes application, especially under pressure, much more under your control as you are not dealing with a floppy bit of silicone; something that often seems to have a life of itself. If there is an awkward contour you need to work around, you should make little snips through the frame to allow the piece to flex.
I have used this technique many times now and I believe it makes my – and therefore your – job easier; it’s hard enough as it is.
On a final note: I have had issues with hot glue adhering to IPA based cap plastic. A workaround is to sandwich the hot glue between the bottom and top layers of IPA cap plastic when making the piece.
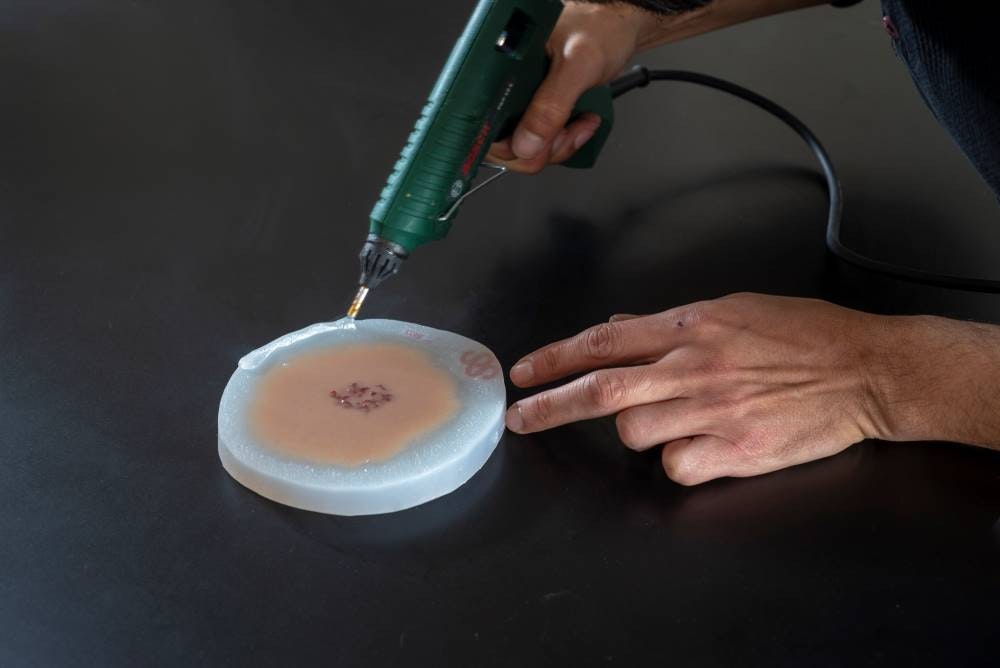
Application of hot glue, the trick is to have the nozzle 2 or 3mm above the mould surface, so the glue goes straight onto the cap plastic. Too close and the nozzle will melt the cap plastic, too far away and you get a poor heat bond.
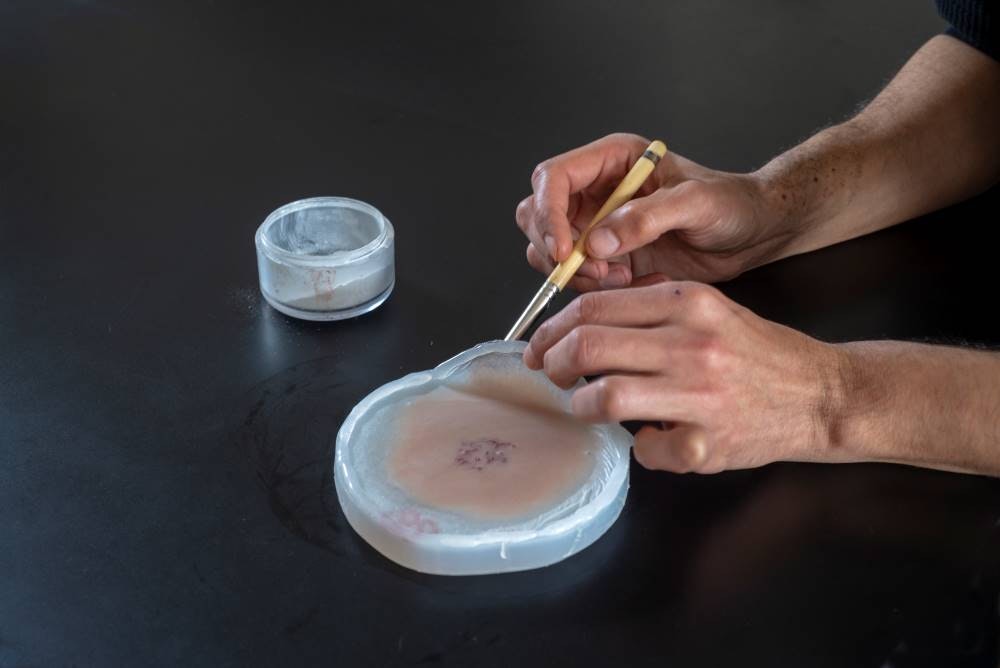
Let the glue cool and powder lightly during de-mould.
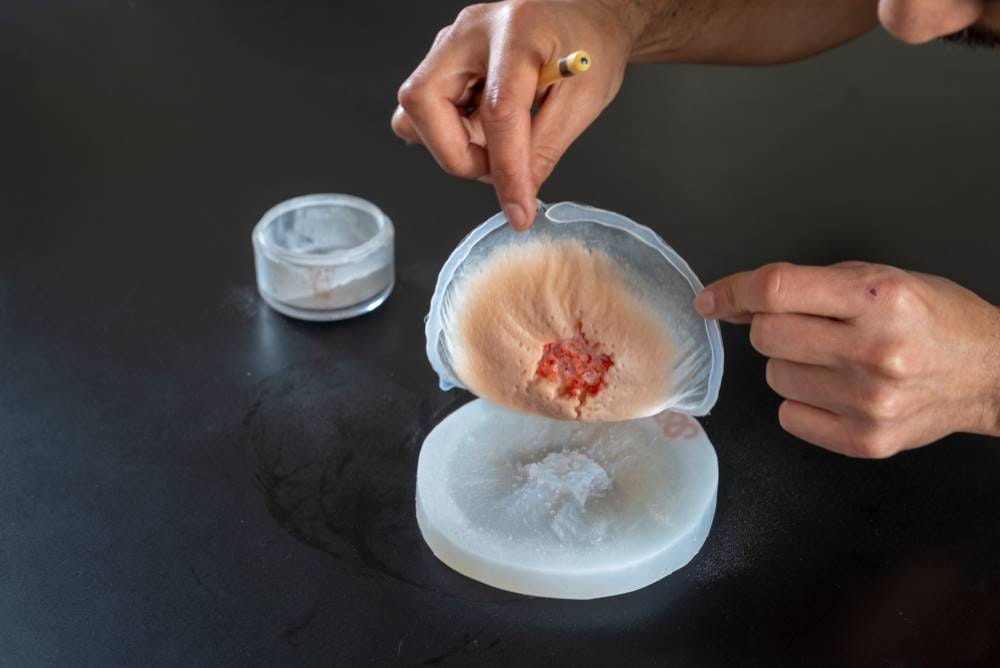
A glue pen can be useful for small quick pieces, handling a pre-glued piece in the rigid frame rocks!
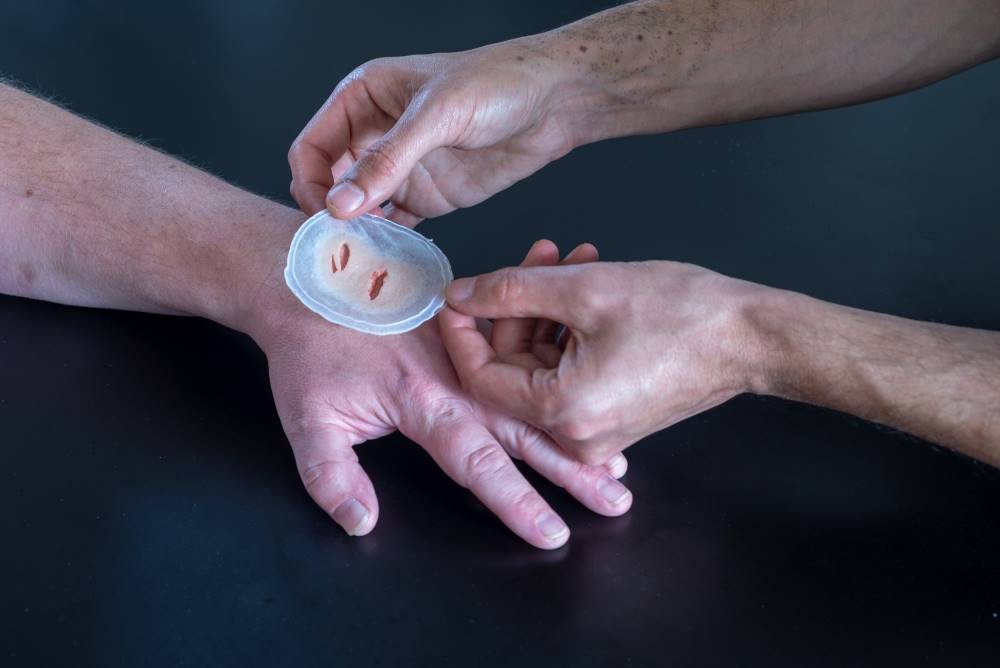
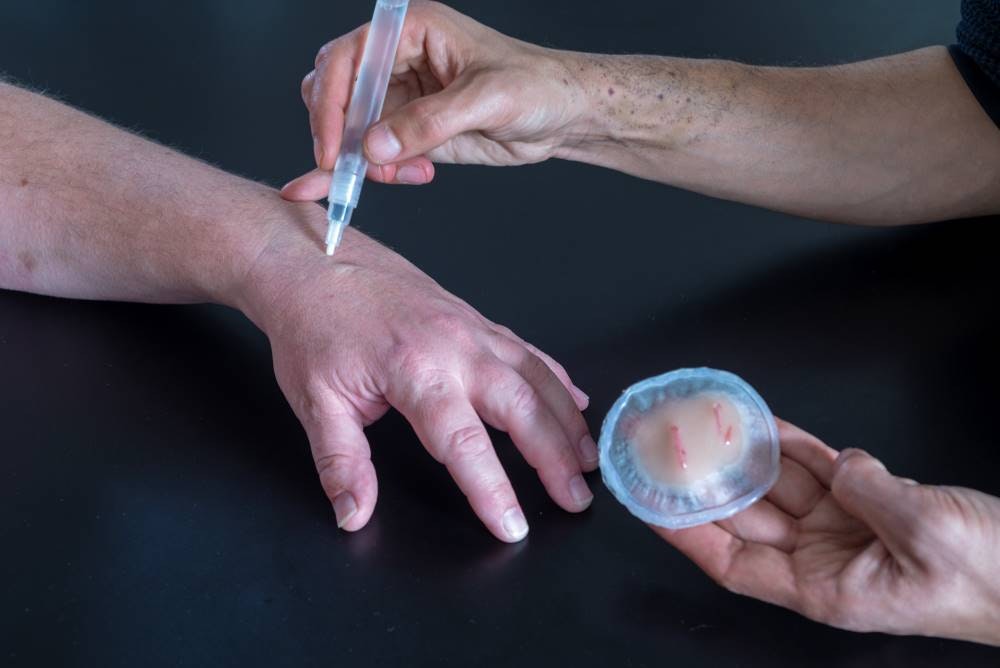
Carefully apply the piece, pressing down from the center outwards to not trap any air bubbles between the skin and the prosthetic.
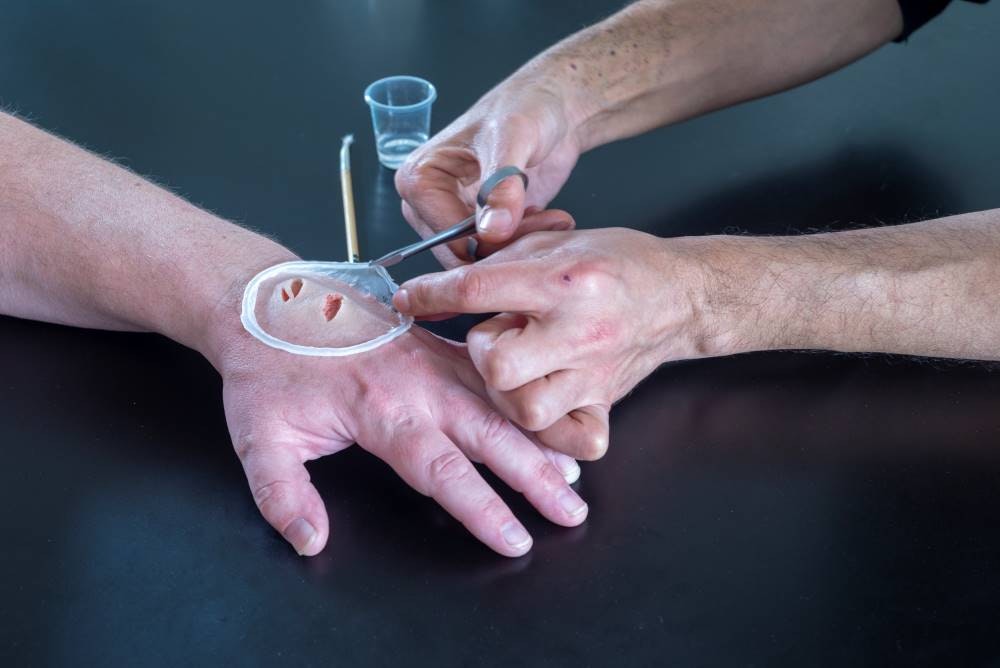
Snip through the glue frame, it helps to start blending the prosthetic onto the skin by dissolving the edges with solvent.

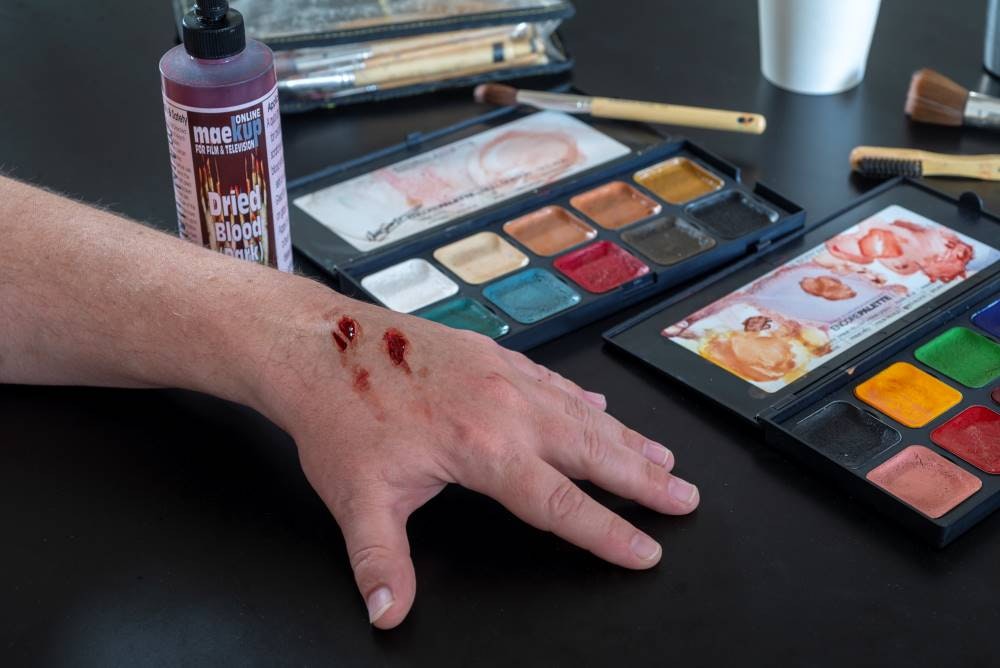
Complete with your favourite colours and finishes 😉